How to
Gradelink Scheduling for Private Schools
Gradelink offers flexible and intuitive scheduling tools that streamline class management for administrators and teachers and make life easier for students and their parents. Whether your school operates on quarters, trimesters, or semesters, Gradelink makes it easy to build, manage, and view schedules—without the headaches of double bookings or confusing setups.
If you’re looking for a quick way to understand Gradelink’s scheduling features—or prefer skimming to watching a video—you’re in the right place.
TL;DR: What You’ll Learn
Gradelink provides flexible scheduling.
- Simple, weekly, and bi-weekly scheduling options
- How to assign students without conflicts
- Viewing, printing, and managing schedules
- Planning schedules for future terms
Prefer Video? To watch in full-screen mode, type “f” once the video starts playing.
Set Up Preferences: Days, Periods, and Locations
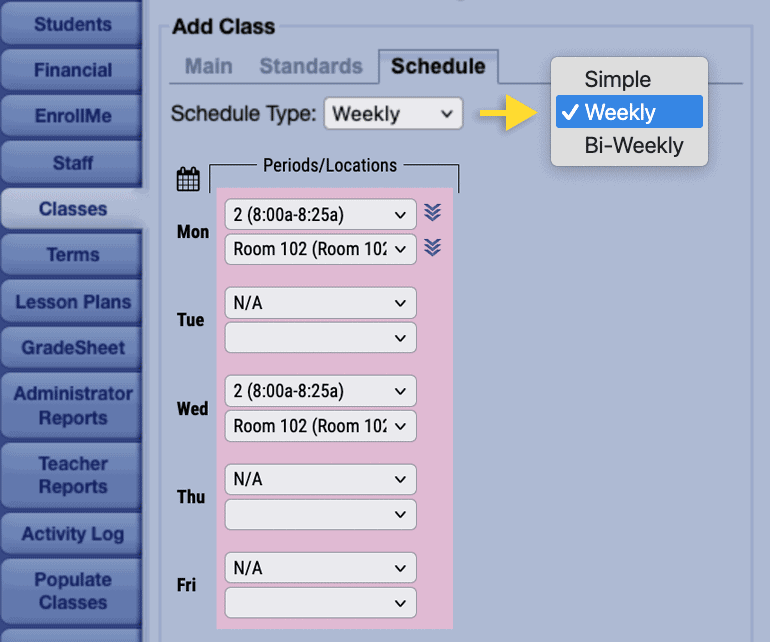
Before you create a schedule, it’s best to set up your scheduling preferences. In the Classes tab, there is a setting to customize the following:
- Days of the week when classes can meet
- Time periods, which can overlap—ideal for special events like assemblies
- Locations, e.g., classrooms, labs
Creating Your Terms (Quarters, Semesters, Etc.)
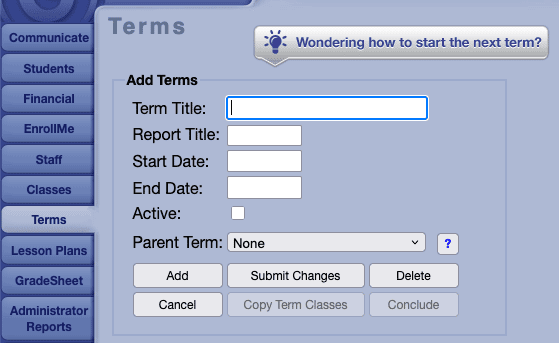
Every schedule starts with defining a Term—this is the timeframe your classes will operate within. For example, a school year divided into four quarters would require four distinct terms. If your school operates on semesters, you would have two terms: semester 1 and semester 2. If you have quarters inside of semesters, you would have six terms: 4 quarters and 2 semesters.
To set this up:
- Go to the Terms tab in Gradelink.
- Type a term title, start date, and end date.
Plan Ahead Without Going Live
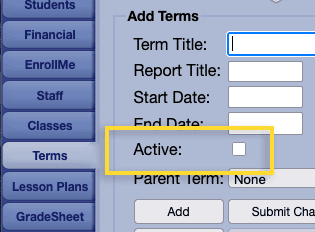
You can build schedules for upcoming terms in advance without making them visible to students or parents by not making the term “active.” These schedules remain hidden until the term is activated, giving admins the time to finalize plans before releasing them.
Class Scheduling: Simple, Weekly, and Bi-Weekly Options
Once your terms are set, navigate to the Classes tab to schedule the classes.
To schedule a class, select the class and choose from one of the following scheduling formats:
- No Schedule: That’s right, you don’t have to schedule every class.
- Simple: Same time and location every day
- Weekly: Meets only on select days
- Bi-Weekly: Alternates weekly (e.g., Red Week/Blue Week)
Tip: You don’t need to recreate class schedules for every term. Simply copy the setup from the previous quarter to save time.
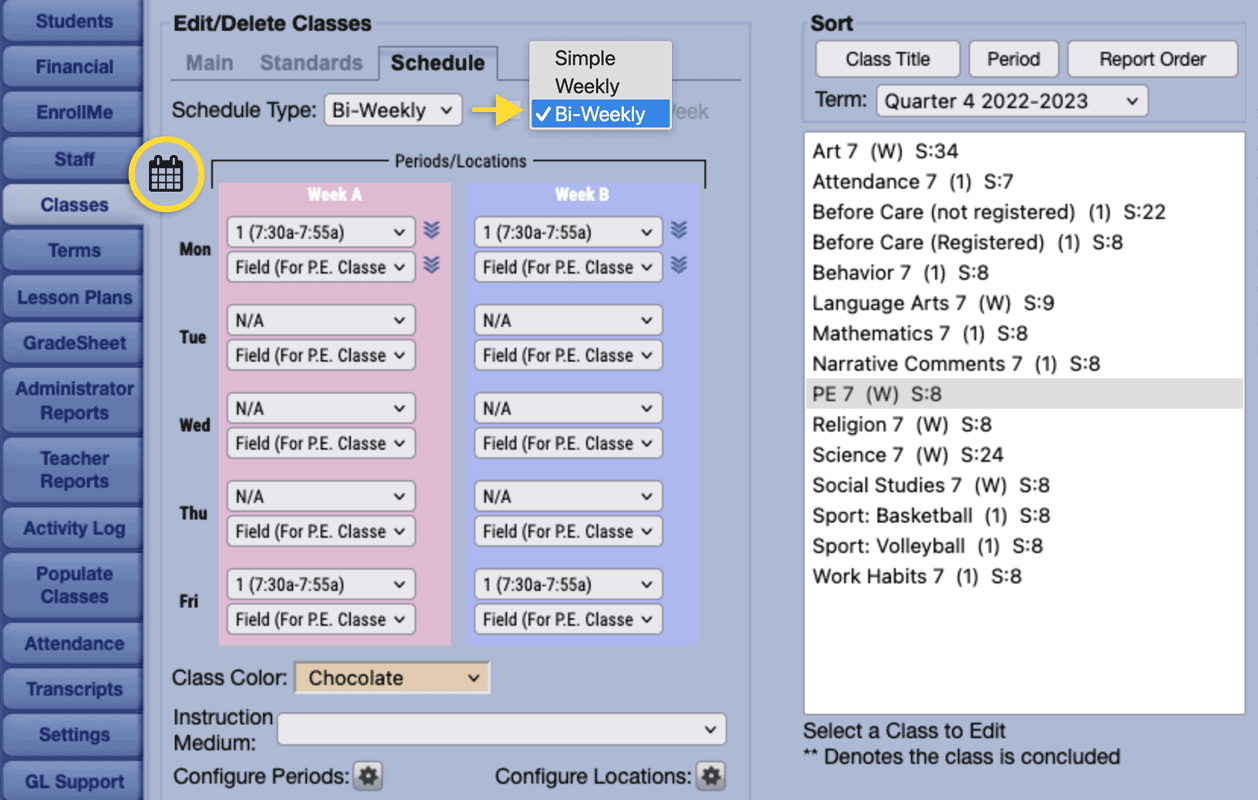
If you use bi-weekly schedules, you can use the calendar icon to see which specific dates the class meets. Non-school days are highlighted in green.
Adding Students to Schedules
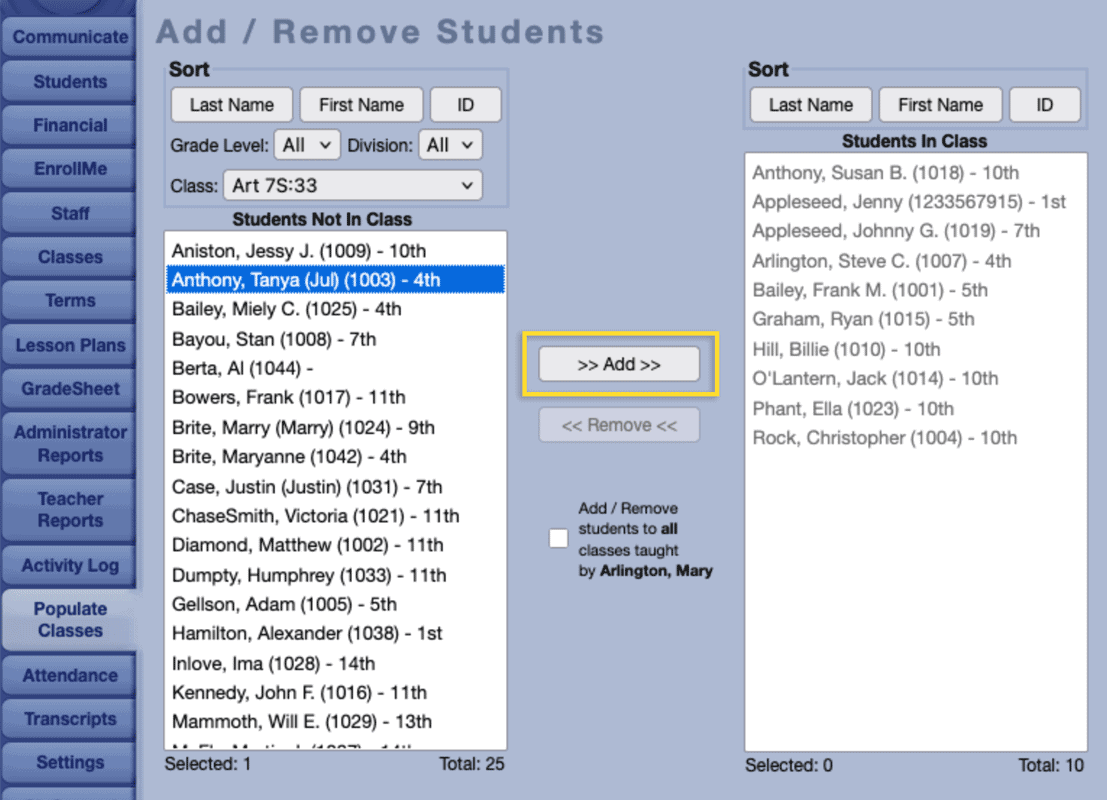
To add students to a schedule, you add them to a class that has a schedule.
- Go to the Populate Classes tab.
- Select the class you want to add students to.
- Select students from the left and add them to the right.
Avoiding Scheduling Conflicts
Preview each student’s schedule to avoid conflicts.
Gradelink alerts you if a student is double-booked so you can resolve issues before saving.
While Gradelink doesn’t track teacher availability automatically, a simple workaround is to create a “Not Available” class and assign it to teachers when they’re unavailable.
Managing Sections and Duplicate Classes
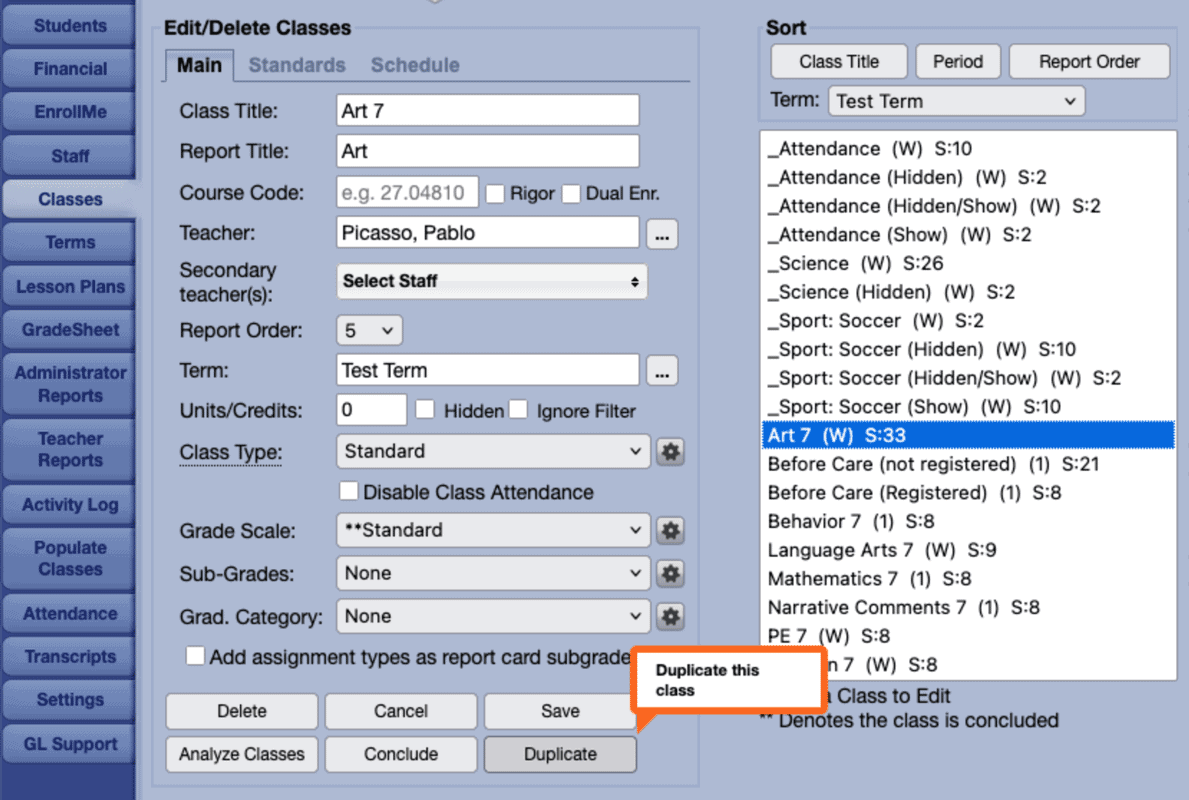
If you have multiple sections of the same class (e.g., two Pre-Algebra classes):
- Create the first class as usual.
- Then duplicate it and assign it to a different teacher.
- Each class is managed separately with no overlap in settings.
View and Print Schedules
For Admins:
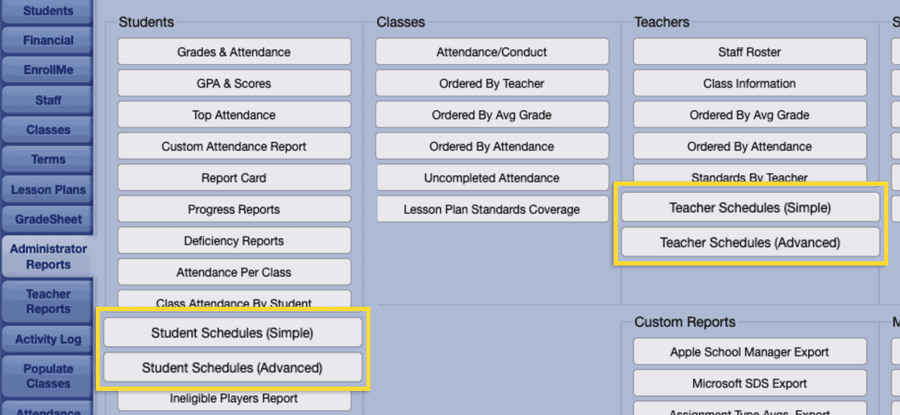
- Use Administrator Reports > Advanced Teacher Schedule to view all classes and their times, horizontally organized by teacher.
- Use Simple Teacher Schedule to see a column-based layout, with teachers on the left and class periods across the top. Click any class to view enrolled students and their grades.
For Individual Students or Grade Levels:
- Use Administrator Reports > Student Schedule to generate schedules for individuals or groups.
- Choose between Simple (uniform classes) and Advanced (variable schedule) layouts.
For Students and Parents:
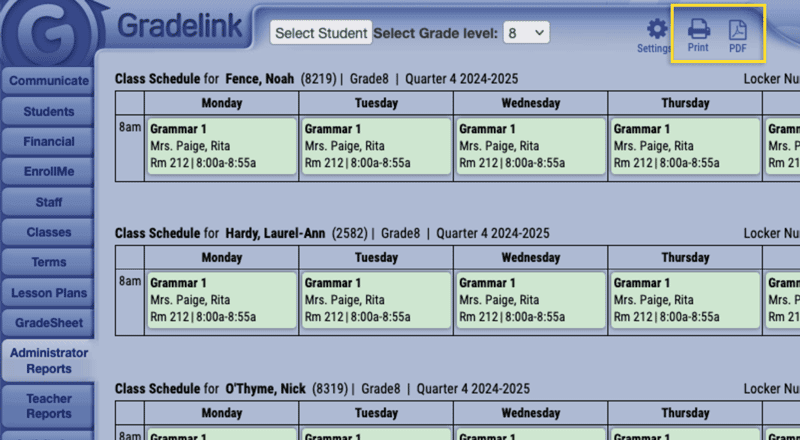
- View schedules via the Schedule tab.
- Switch between weekly and daily views in the mobile app.
- Use the Print or PDF option (top-right) on desktop.
All-new Parent Portal shown above.
Gradelink Scheduling Best Practices
- Use class duplication to save time across terms and sections.
- Avoid conflicts by using the preview function and warnings.
- Customize locations and periods early in setup to simplify assignments.
- Plan future schedules without publishing them immediately.
Need More Help?
Final Thoughts
Gradelink’s scheduling capabilities are designed with flexibility and ease-of-use in mind. From simple daily classes to complex bi-weekly rotations, you can tailor schedules to your school’s needs—while avoiding the hassle of double bookings and schedule conflicts.
Whether you’re an admin finalizing next term or a teacher checking your availability, Gradelink has the tools to keep your school running smoothly.
Watch the full video tutorial for a visual walkthrough, or revisit this post anytime for a quick reference.


