

With Gradelink, your school communication isn’t limited to plain text. SmartSend email, School News, and Teacher Pages make it easy to include photos, graphics, videos, tables, and more.
Versatile and Dynamic Communication Tools
- SmartSend is Gradelink’s built-in email system. Email is also included in District Login.
- School News posts are an excellent way to share important information with your school community. It’s the first thing administrators, staff, students, and parents see when they log in to Gradelink.
- Teacher Pages provide personalized web pages to keep students and parents informed with announcements, weekly schedules, assignments, and more.
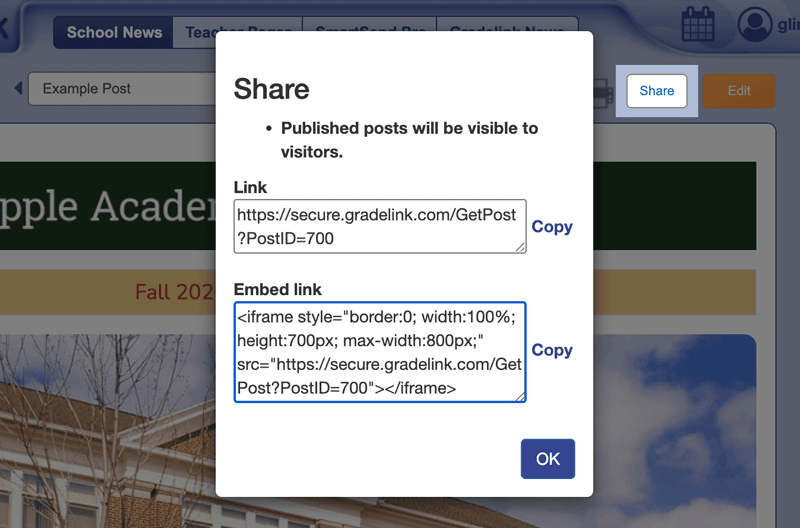
- School News and Teacher Pages can also be embedded on your school website and shared via links.
Click here to see examples of completed posts.
Getting Started
Here’s an overview of the available tools for building better posts and emails. Click here for more detailed instructions.

To compose an email, click the Communicate tab, then SmartSend.

To create a new School News or Teacher Page, click the Communicate tab, then School News or Teacher Pages, the Edit button, and finally the New Post button.
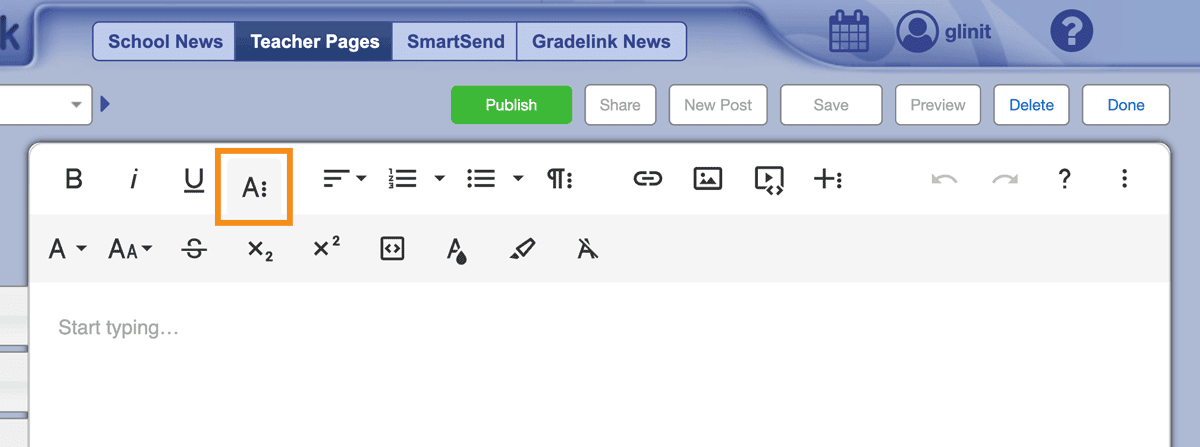
Format Your Fonts
Click the “A:” to access additional type formatting options, including fonts, size, subscript, superscript, and color. You can also insert code snippets.
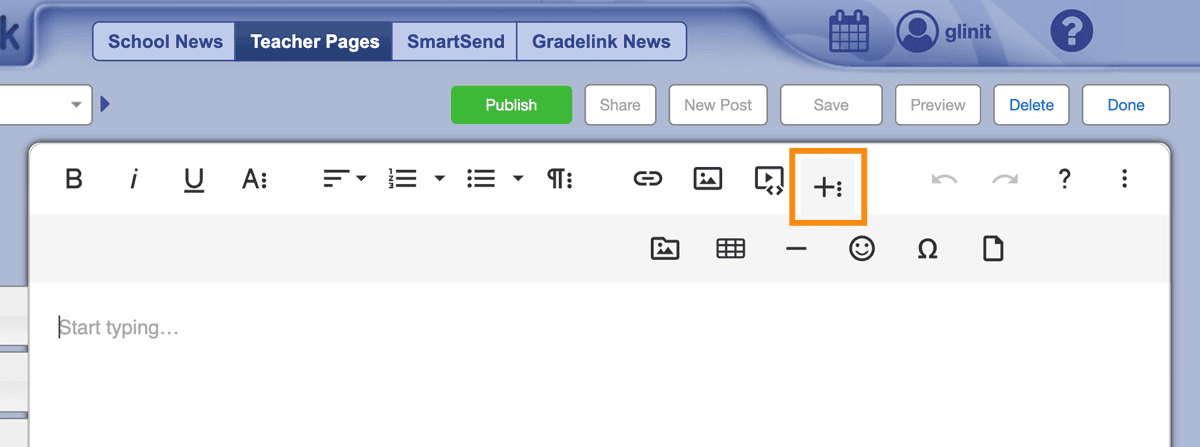
Additional Features
Click the “+:” to insert tables, horizontal lines, emojis, and special characters, and upload files to insert into your post.

Undo and Redo
Make a mistake? No problem! Just click the Undo icon. Change your mind? Still not a problem. Just click the Redo icon.
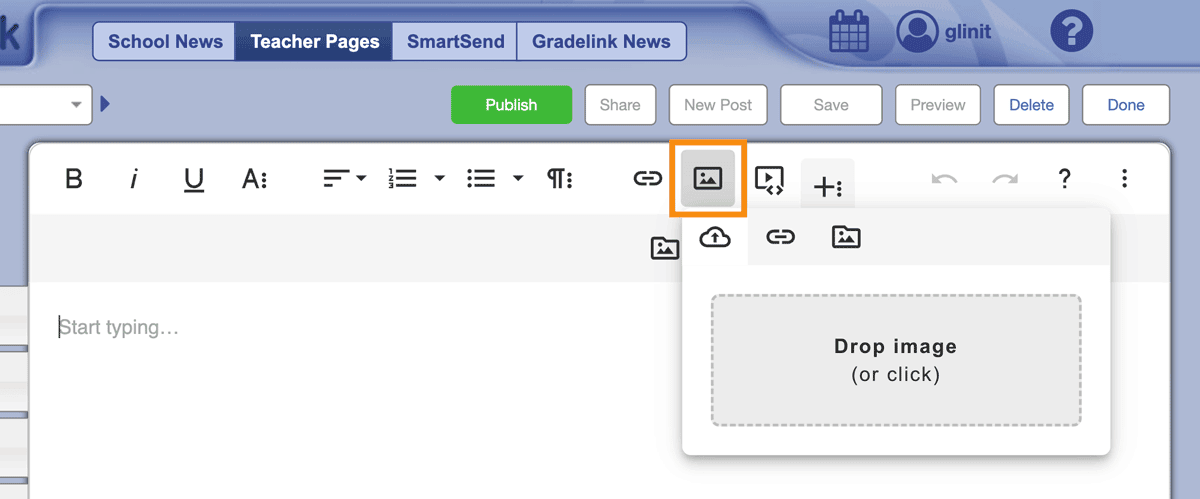
Add Images
There are four ways to add images:
- Drag and drop an image from your computer to anywhere on the post or email.
- Click the picture icon, then click the gray box to navigate to where the image is stored on your computer.
- Click the picture icon, then click the link icon to enter the image’s URL.
- Click the picture icon, then click the image folder icon to select from saved images.
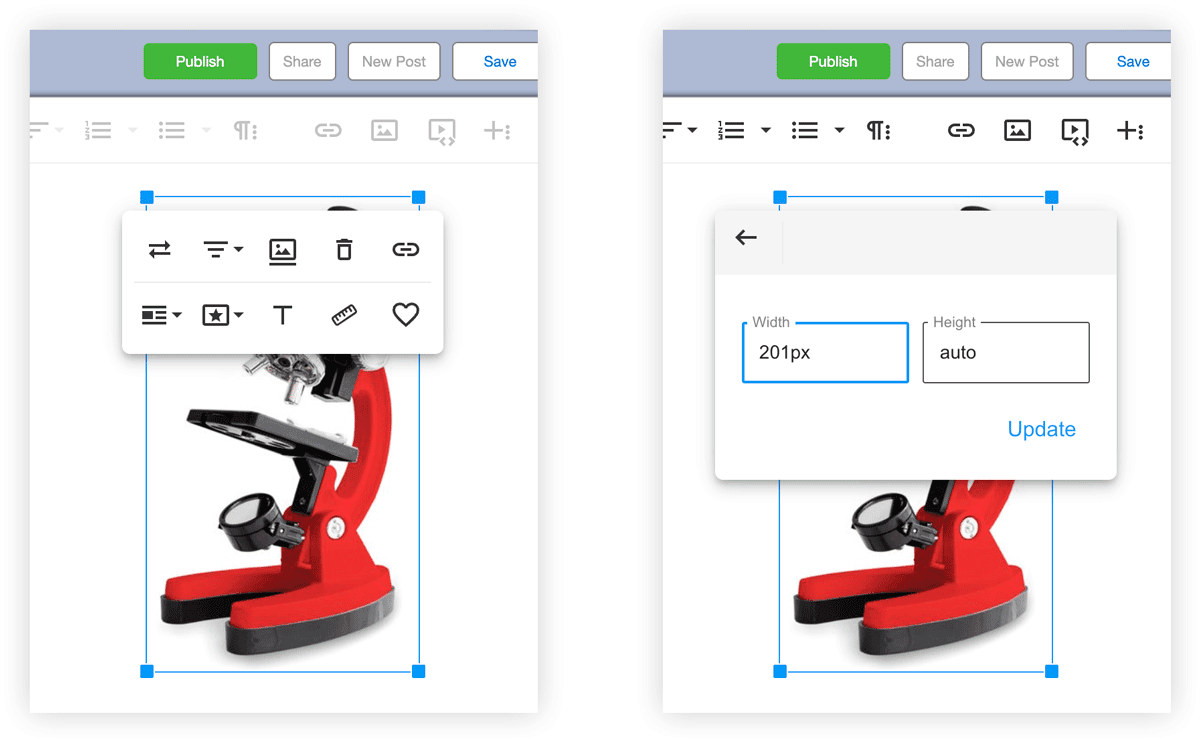
To resize an image, click on it and drag any of the blue squares or click the ruler icon in the pop-up window to enter a specific size. The pop-up window also includes other options, including alignment, adding a caption and a link. Clicking the heart icon adds the image to a library, making it easy to reuse later.
Tables
Tables are an excellent way to organize your content, and Gradelink provides several options to style them.
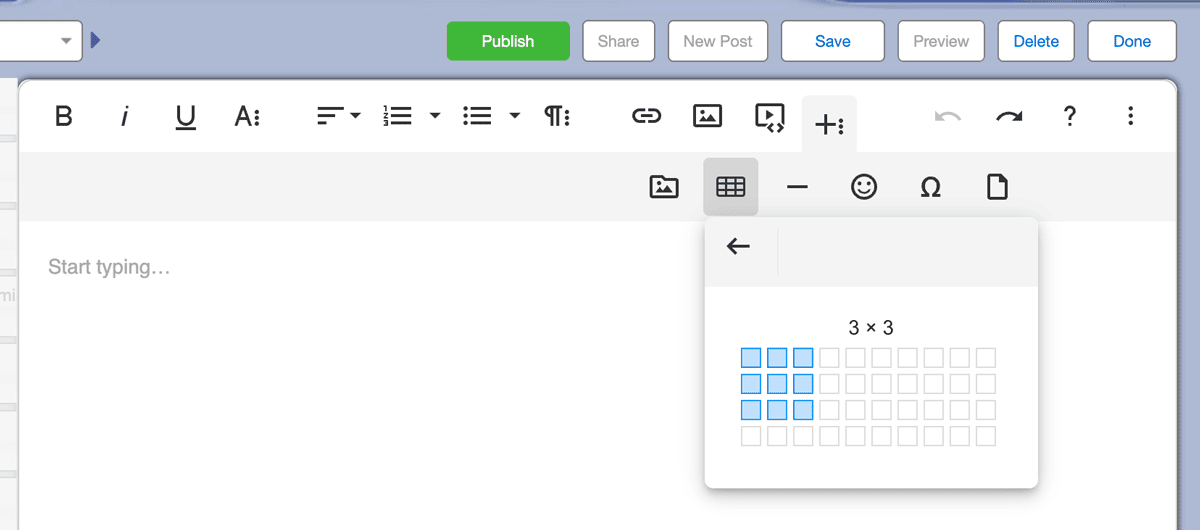
Create a New Table
Click “+:” and the insert table icon. Drag over the boxes to select the number of rows and columns you want. Rows and columns can also be added and deleted after the table has been created.
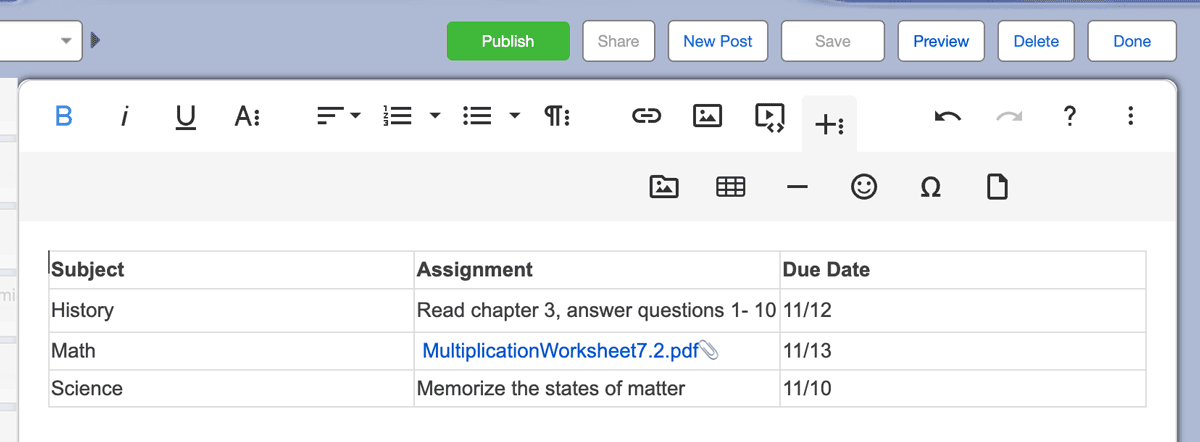
Here’s what a default table looks like with text in each cell. Column widths can be adjusted by clicking and dragging the column frame. While multi-column layouts and nested tables are possible, display can vary on mobile devices. We recommend testing posts on a few screens before publishing when using two or more columns.
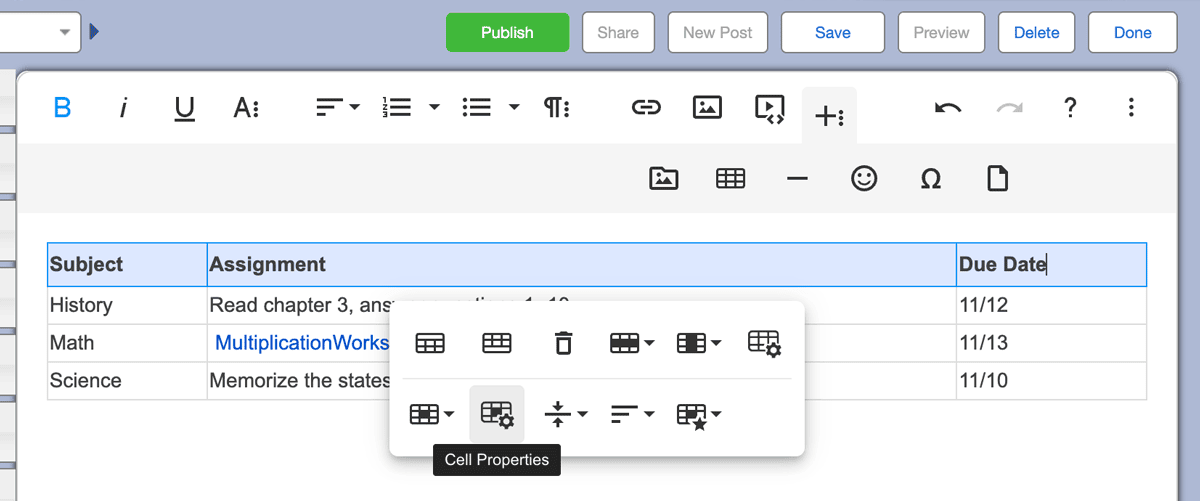
To add color to a cell, click in a cell or drag to select multiple cells, and click the Cell Properties icon in the pop-up window. In this example, the cells in the top row were selected to modify them all at once.
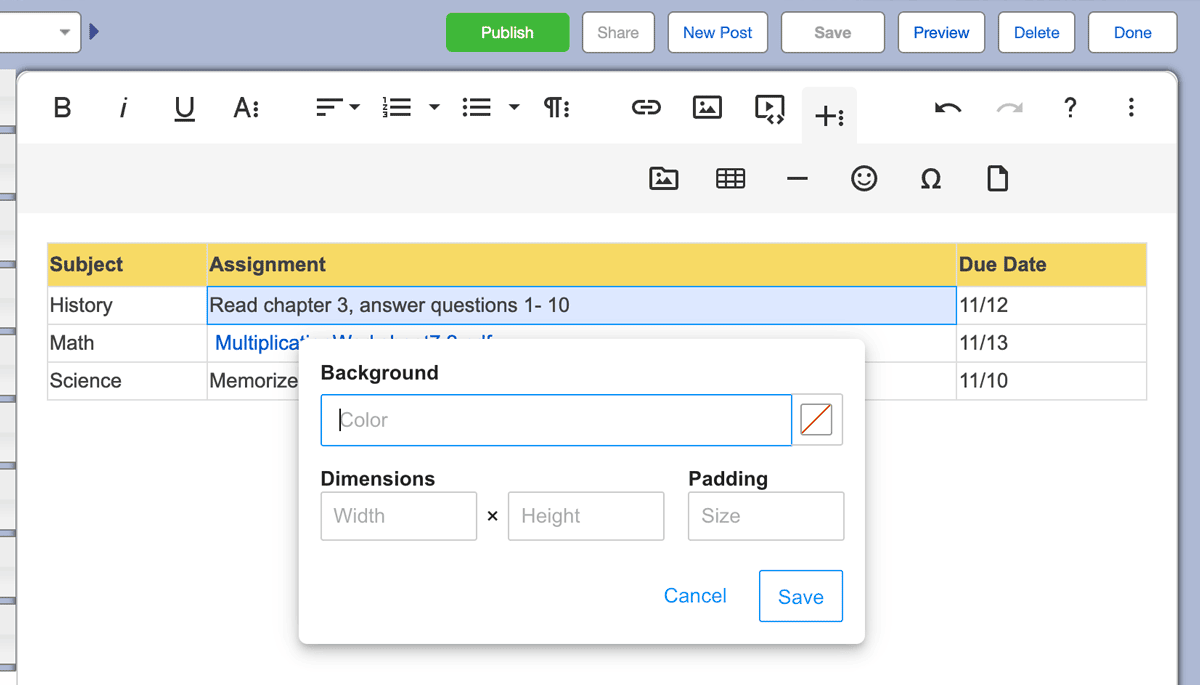
To color the cell, either enter a hex code for the color or click the square with the red diagonal line through it to select a color from the pallette. When you’re finished, click Save.
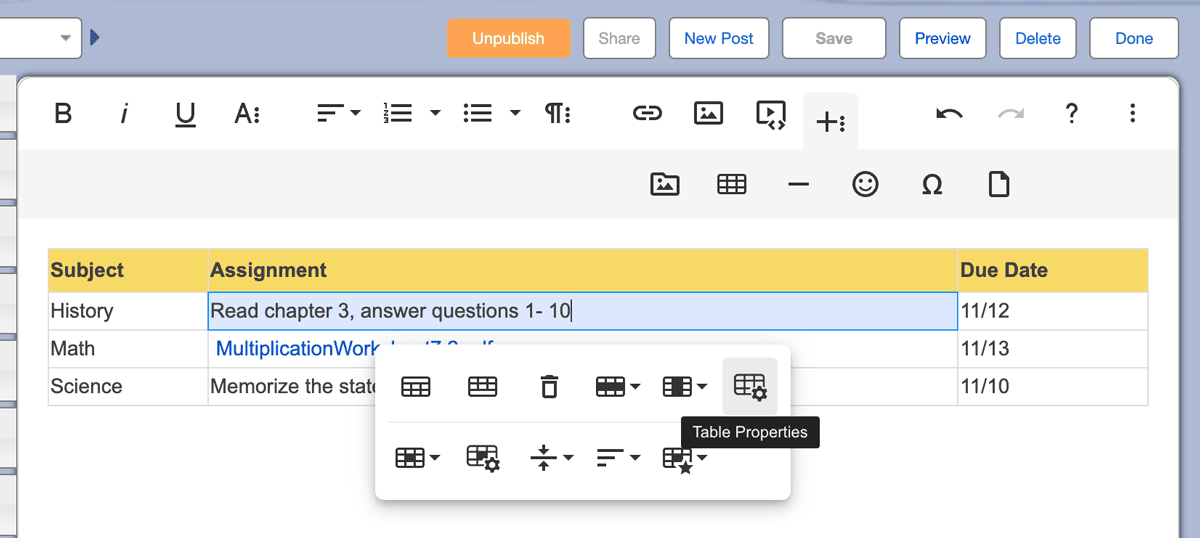
To modify the appearance of the entire table, click any cell in the table, then click the Table Properties icon.
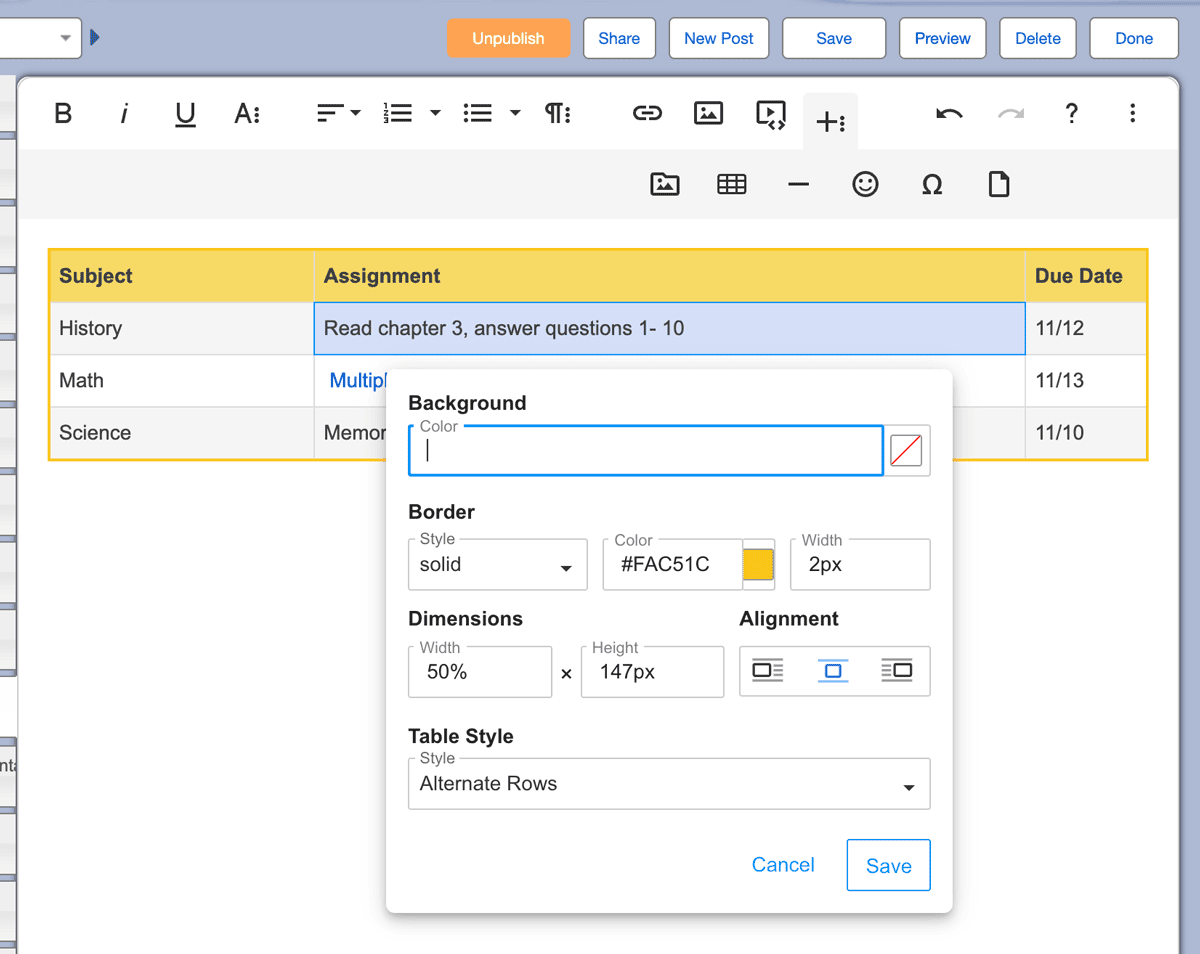
From here, you can change the background color, border style, color, and width, and set the rows to alternate colors.
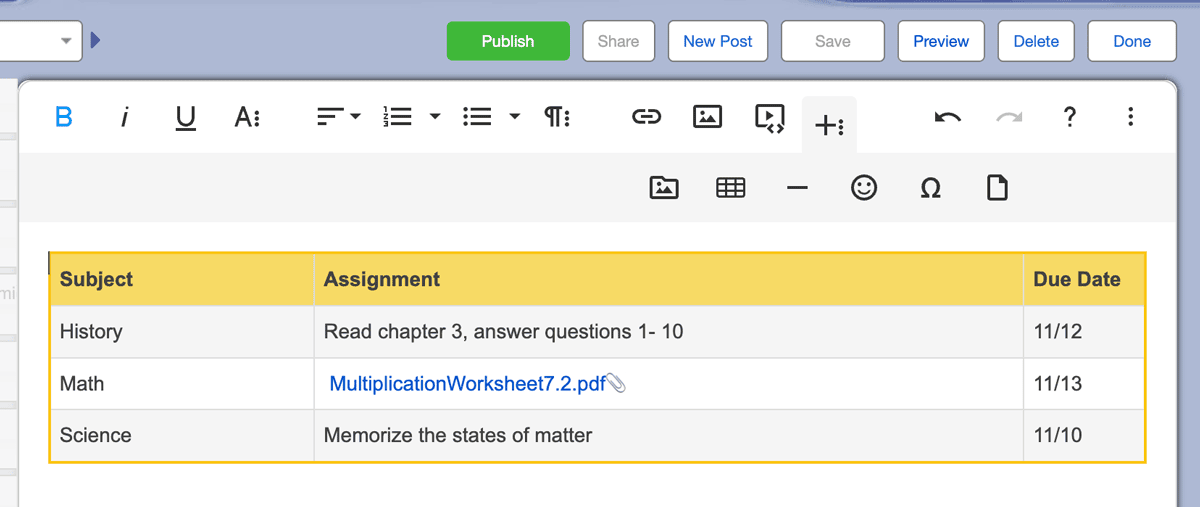
Here’s what the finished table looks like. In this example, the padding was set to 6 to add a bit of space between the cell frames and the text.
Share Your Posts
Examples
Scroll through the two sample posts below to see how these elements work together.
Here is an example of an embedded School News post incorporating images, tables, links, and a video.
This Teacher Page includes a colorful banner, tables, superscript text, links to a PDF assignment, and emojis.
We hope these examples inspire you to create more engaging posts and emails. If you need more detailed information, please click here to visit Gradelink’s help website.